Traduce a Espanol!

Showing posts with label craft. Show all posts

Tuesday, February 23, 2021

Caterpillar to butterfly - an interactive Easter Children's message


Explain at the beginning of the service, that while worship is going on - that they are to color at their tables (with markers), the coffee filters provided.  At least one person per table should color one - but everyone is invited to do so.  These will be used during the children's message illustration.  Each table, besides markers and coffee filters, needs a pre-decorated clothespin for each person (to look like a caterpillar shown below) and a toilet paper roll for each person.   This craft was found here if you want more detail!


When we see a caterpillar what do we think?  (have everyone pick up a clothespin that is dull brown and that was decorated beforehand)  What words come to mind when we see a caterpillar? (put pic on screen)  Ugly?  useless?  slimy?  creepy?  Are we ever like a caterpillar?  Do we ever feel like one on the inside?  Do we sometimes feel ugly?  useless?  Do other people ever hear our words or see our actions and think that we are ugly? or mean?  I'm sure, at some point in our lives, we have felt like a caterpillar.  And I'm sure, that at some point in our lives we have messed up, and people have seen us as a caterpillar.

But what about Jesus?  Was Jesus ever a caterpillar?  We certainly never think of Jesus as ugly or creepy.  But Jesus still died FOR us, even though he was perfect and we are not.  After Jesus died, he was wrapped in cloth and laid in a tomb.  This part of Jesus' life does reminds me of a caterpillar - as it makes its cocoon.  


Take your caterpillar and clip your coffee filter in it.  Wrap it up, just like Jesus was, and place it inside the tube...which is our tomb...or cocoon.  


For 3 days Jesus was in that tomb.  For 3 days his friends and disciples grieved and wondered and worried.  Do we ever do that?  Do we worry about what is going to happen?  What has happened?  Of course we do.  Although the Bible tells us clearly "do not worry", we still do.  

But on that 3rd day, when some ladies went to the tomb, what did they find?  It was empty!!  (pull out the caterpillar/butterfly and everyone will probably do the same).  

Jesus had risen!  He was alive!  He died and rose again for US - to give us NEW LIFE so that we could be changed - like the caterpillar to a butterfly.  


We were give new life in Jesus and we should never forget that.  When we are baptized into the church, water is put on our heads, right?  The water is a symbol of being cleaned and our sins and ugliness being wiped away.  So, to remember how we become new in Jesus and to help us remember our baptism and new life in Christ, someone at your table, bring up your butterfly to one of my helpers at the front with a spray bottle.  They will spray your butterfly (and you if you want to be sprayed ;)  Take it back to your seat and watch the water turn your butterfly into something amazing!  Watch the colors run together and brighten. Watch it have new life.


(continue speaking as they get sprayed) Yes, bad things happen.  God never promises that our lives will be perfect.  Yes, we mess up.  Yes, there will be times in our lives when we feel and look like a caterpillar.  But the GOOD NEWS is that that is NOT the end!  The story, OUR story, doesn't end there.  We have new life in Christ and with the resurrection, we are given the chance to be a butterfly.  So, soak in the resurrection this year and let your colors shine through!!  Show the world your brightness.  Be the person that God has created you to be!  In the name of the father, son and holy spirit, All God's people say - Amen!


HAPPY EASTER!

Wednesday, October 21, 2020

Thanksgiving Blessing Jars - Use year round!


When my kids were really little, I attended a MOPS program.  I actually attended one in NC when I lived there, and joined one in Ft. Lauderdale, when we moved there.  At one of the meetings, we made meal blessing jars and I absolutely LOVED ours.  When my kids were old enough and were actually eating up at the table with us (and could talk), we started using it.  They loved it and so did I!  One of them would pull a blessing out of the jar and whatever it was, we had to say (or sing!) it.  We used it for years.  I still have it (they are now 12 and 14) and as you can see, it is quite loved :) Most of the stickers have fallen off and almost all of the blessings are ripped or peeling...it was used a lot :) 


I decided that since it meant so much to my family, I wanted to make one that the families in my church could use and that other Christian educators could use - in person or via mail/email.  I loved the blessings that my jar had, but my MOPS group didn't include any Scripture - so I've added some new ones that include some verses of thanksgiving.  This would be a great tradition to start now around Thanksgiving - but continue it year round!  

If you're a parent reading this and want to do it, you can go on google and find/make your own blessing printouts, or just go to these links on Etsy or TPT, (it costs $1.25), download it, print it out, and there ya go!  (and maybe share it with the Christian Educator at your church!)

If you're an educator and would like your families to make one, simply go to the link above and purchase it, print out enough copies for all your families and you can either do it together at church or send the supplies home for them to do as a family activity.  Most people have jars and glue or tape at home - but they would need the blessings and popsicle sticks mailed to them.

My children enjoyed decorating the jar and sticks, so sending along some stickers would be a good idea!

Here is the activity...while you're making it, read one of the Scriptures I've provided and ask a few questions (included in the download).  Make it a devotional time!

First, decide if you want to make long sticks or short ones - depending on the size of your jar.  I have provided two options to print out.  The longer sticks look nice in a tall jar, but if all you have is a short jar, the shorter ones look better (and fit better).  Print out your blessings on different colored cardstock and cut them out (if you have fun scissors, you could make different style cuts).  Glue them on to your popsicle sticks.  (FYI, the sticks are the same lengths...it's the blessings that are different sizes).


Once you have your sticks, you can decorate both your jar and the blessings.  You can even change the look of your jar with each season.  Since it's fall - I went with a fall look :)  

short jar with shorter printout - I believe this is a large baby food jar (?)

 mason jar with longer printout

Right before your mealtime, pull one out and whatever it is - you HAVE to do it!  Even if you feel silly ;) lol  After a few months, my kids had memorized which blessings were on which sticks, so we had to do it with our eyes closed :)  I hope your family loves doing this as much as mine did!

Go here to go to the product on my teachers pay teachers page.  Here is the Etsy link if you prefer that platform :) 

I also wrote a month long interactive Family Devotional of thanksgiving that I'm very excited about!  It can be used the month of November or any time you want to emphasize being thankful!

Enjoy and God bless!

Monday, April 2, 2018

Easter Alleluia Butterflies!!


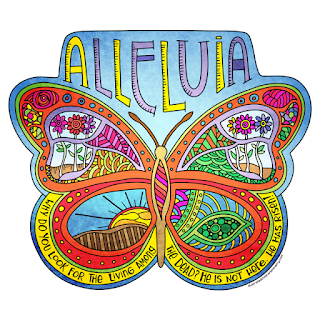
This year I decided to jump on board with a tradition that has evidently been around for a long time...but that I just learned about!  It's called "burying alleluias".  You can click on it to learn more about it.  I thought it was a neat visual for the kids to remind them what Lent represents.  So, at the beginning of Lent, I gave them a piece of paper that had the word "Alleluia" written on it very lightly.  They were to trace the letters and decorate the paper.  I also gave them (and the adults in our contemporary service) the alleluia butterflies that illustrated ministries sold this year.  They were beautiful!    

Once they were all done with their words and their butterflies, we rolled them up and taped them shut.  Then, they put all of their papers on a small parachute that we had. 
I explained what we were doing and when we would open it back up, then I rolled up the parachute and put it away until Easter.  :)

Easter morning, during my children's message, I placed the parachute...or "cocoon" as I then called it, in the middle of our circle.  I reminded them what was inside and why we put it there.  (this pic is from the contemporary service - I also did it in the sanctuary for our traditional service...but it was a smaller space).
Next, I told them that we were going to make our Alleluia butterflies FLY! And as they were flying up in the air, they (and all of the congregation) were to shout Alleluia!  Because Jesus is risen, the tomb is empty and we can, and should, Praise the Lord!


We "made them fly" three times and then closed in prayer :)  I let them take a blank alleluia butterfly and crayons back to their seat (as well as an activity booklet they helped me make). 

I was a little nervous doing this because it isn't your normal children's message...but I had many adults come up to me afterwards and say how much they enjoyed it :)  I think adults need an excuse to shout Alleluia just as much as kids ;)

Happy Easter!!

Saturday, November 28, 2015

Candy cane crafting!


We are having a Christmas get-together/meeting at our house this week and I wanted to make a little "thank you" treat to give to everyone that will be attending.  I browsed pinterest and found a
couple of blogs that talked about being able to bend candy canes...not melt them...but bend them.  I was intrigued so I thought this would be fun for me and the kids to make for our guests :)  Unfortunately, it proved too hard for my youngest to "bend" (too hot for her young fingers and she got frustrated trying to use tools) and my oldest was only interested in designing the shape...not bending them :)  But they helped out in other ways - laying the out on the parchment paper, getting them out of the packaging, coming up with different designs, helping me decide if what I made was good :) and then placing them in bags at the end and tying them with a bow.

All you need is parchment paper, candy canes and a baking sheet and you're good to go :)  Both blogs I read said different temperatures and times.  Every oven is different, but after multiple tries I found my gas oven to work best at 270 for 4-5 minutes.  300 proved to be too hot even at 2-3 minutes.

My first attempt was at a heart.  I layed it out as pictured below:


It really didn't matter if the the cc were exactly where you needed them, but I found that once you pull them out of the oven you only have a short window until they get hard again - so having them where you want them helps speed things up :)  To make the little circles (which I call "ornaments" ;) I just used one regular candy cane and shaped it into a circle - easy :)

After the heart turned out well I got adventurous and tried to make the word "Joy".  The "J" was easy because it's the shape of a cc.  For the "o" I broke off the stem and then for the "y" I broke the loop in half and split it (like below).


It took some fast "bending" but they turned out neat!


My daughter designed the star in the top middle.  I wasn't sure how it would turn out because it's 4 sticks place on top of each other - but I think it looks great!  My son designed the flower below - it also turned out good...it just used quite a few candy canes :)  the sideways looking "g's" in the above picture were my attempt at making little sleds with a gift sack on top...too ambitious :)  they just look like "g's".  lol  I was hoping that once I filled in the sacks it would help...but it didn't ;)


I also made quite a few crosses - all of them different - but I don't think any of them look better than another.  But it was easier to just get two sticks (rather than 1 long and 2 short) and just smush them together in the middle :)

The last two things I tried were a snowman and a Christmas tree.  My kids had their doubts but applauded my efforts :)  They both broke as I we were putting them into the baggies and I had to re-heat them and mold the pieces together better.  But I like them :)


The snowman is pretty obvious - 3 candy canes each one shorter than the other.  The Christmas tree took 5 candy canes stacked on top of each other and the stem is shorter on each level.  I couldn't get the top quite right...I think a curved top would've looked better...

So, after we made enough for all of our guests to get one, we copied an idea from the other blog I read and filled in some of our creations with melted white chocolate...cause...why not? :)
The picture of the pan above (with the little "g's" :) were all the pieces we filled in.  I forgot to get an "after" picture, but here are a few examples.  Then, we wrapped them in little bags and tied them with a bow :)  It was fun!!


Have fun Candy Cane crafting!! :)


Wednesday, July 15, 2015

He's Got the Whole World in His Hands tee!


Our VBS theme this year was He's Got the Whole World in His Hands and I decided to make some world t-shirts with their hands around them. It wasn't an easy process and it took me a few trial and errors to figure out what I wanted, but with organization and plenty of helpers for our littles - they turned out awesome!
Follow these five easy steps and you've got yourself an awesome t-shirt :) AND all your friends' handprints as a memory :)

1. Prep beforehand - cut out contact paper circles and put them on the backs of the shirts - put them close to the top but leave room for their hands. Second, cut out something (cardboard, newspaper, etc) to put inside the shirt so the paint doesn't go through. We also wrote their names on the tags beforehand but that's not a must-do :) 

2.  The day of - I put out the paint and paint brushes beforehand and decided to number the tray and the paint. It helped if the child or helper needed more of that paint (cause some were similar in color) but it wasn't a big deal if it got mixed. I just wanted to be over-prepared.
3.  As the children came in we had each of them stand at a shirt at the table. Then we let them pick out their paint. For the littles, the helpers got the paint.  Make sure a variety of colors are chosen - yellows and oranges are bright and fun :) At first we had them stand at their shirt and then we realized - duh! They all look the same...doesn't matter where they stand. ☺️ We did have the shirts grouped by classes though beforehand which made it easier.  IMPORTANT: AFTER DOING A TRIAL RUN, I REALIZED THAT IF THE WORLD IN THE MIDDLE IS TO POP OUT, YOU CAN'T HAVE BLUES OR GREENS AROUND THE OUTSIDE! So, stick to pink, red, orange, yellow and purple hands:)


4.  Now you're ready!  If the child is able on their own, have them paint their hand and put it on the shirt themselves. We found that the 2nd grade and up were pretty good at this. One important instruction though - MAKE SURE PART OF THE HAND TOUCHES THE CONTACT PAPER. Otherwise it won't work. Then, the kids pick up their tray, move around to the next shirt, and put their hand on the next shirt. We had around 7-8 in each group and we had them go around twice. Once wasn't quite enough.


5.  Yea! Now let them dry. You need A LOT space for this if you have a big group -just an FYI :)  Once they are dry, peel the contact paper off. They look so cool! :)  we used stamps and did "mosaic art" for the world. You could do it many ways - but this fit our theme.  I had them cover the circle with one shape dipped in any blue they wanted (I encouraged more than one blue), then had them put 3-4 stamps of another shape with green paint.  viola!  awesome shirts!!


One of our groups was really large and some of the hands weren't place correctly.  If the hands aren't all the way around the circle then you can't tell it's a circle :)  So, to remedy this problem, you can see in the above picture I went around the circle (before it was pulled off) with grey paint.  They turned out great!


I've also done one ((an idea I saw on pinterest) with duct tape and made a cross :) easier :)